

What better way to start our AWS journey than creating our first Serverless application that downloads data from the internet.
The main goal of this lesson is to create a Lambda function on the AWS UI that downloads the price of Bitcoin from the Binance API endpoint. After that add a timer to call our Lambda every 5 minutes.
What is a Lambda?
First of all, you can skip to the coding part if you're not interested in this section.
For the long and deep description, you can check Amazon's documentation.

“AWS Lambda is a compute service that lets you run code without provisioning or managing servers.”
And that's the basis of it. You can write your code and don't have to work on the DevOps side. You don't need servers, load balancers or scaling setup as Lambda will handle all that. Less configuration, fewer resources.
But wait. Why doesn't everyone use it then?
As for every service you have to consider if it's the best for your needs.
Pricing
Lambda's pricing is based on the run duration and the memory usage. So if you have a project like this example that uses the least amount of memory, runs within one second, and invoked only every 5 minutes the cost would be $0.02. If you would have the smallest EC2 instance to use for the same service it would cost $4.17.
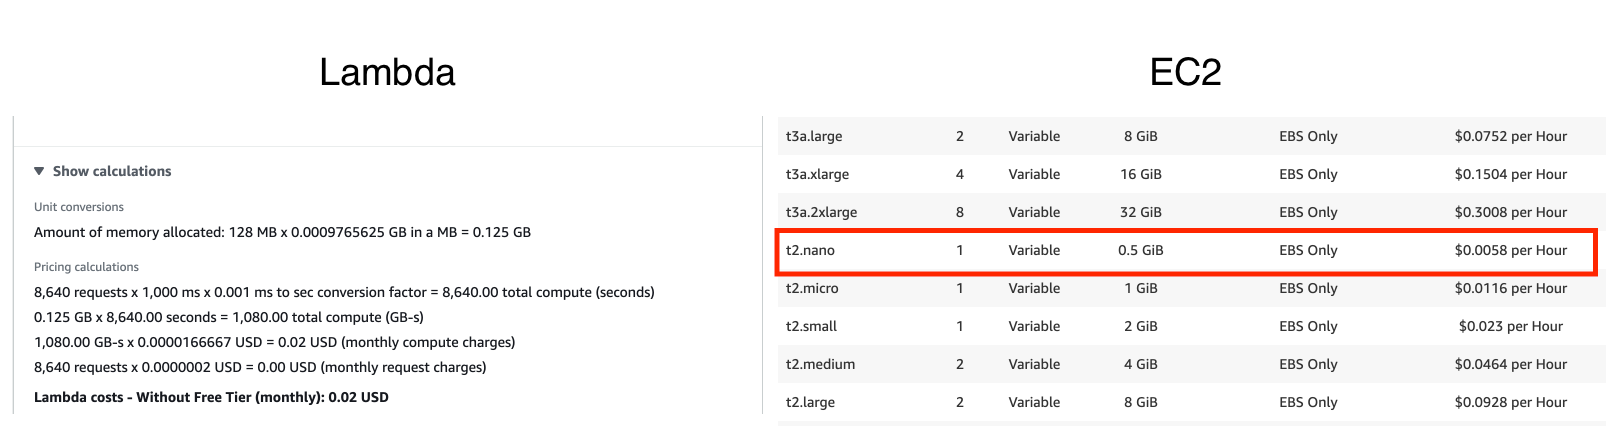
That is cool! It's so much cheaper!
But what if we call it more frequently? If we ran our Lambda every second, that would mean it's running all the time. That would cost us $5.92 monthly. So it's already more expensive than an EC2 instance.
Availability
When you need to run a Lambda, it'll create an instance for you to run your code and then after some minutes it'll stop it if there are no more invocations. In the meantime, nothing runs and nothing can go wrong :) If you have a small memory leak, it won't have an effect on your performance, as it'll reset your instances frequently. At the same time, a common server will just keep using more and more memory until it's out of it and will kill your process. Of course, you can prevent this in other ways, but it's just one example.
Scalability
If you want to scale servers, you have to set up Load balancers and auto-scaling groups so you can scale based on CPU usage or whatever. It can be done easily, but if you run a Super Bowl commercial and suddenly you have 1 million users on your site instead of the usual 5000, it might not scale fast enough. You can prepare for these kinds of spikes, but it requires manual work and a lot of configurations.
Lambda on the other hand is scalable right out of the box. It will just instantiate as many workers as needed at a time. Cold start can be 5 seconds for each, but that's a lot better than having 5 min of downtime while your scaling setup realizes there's a problem and starts a new instance.
Maintenance
No server, no maintenance. So simple. You can save on DevOps time and resources with Lambda.
Creating our first Lambda
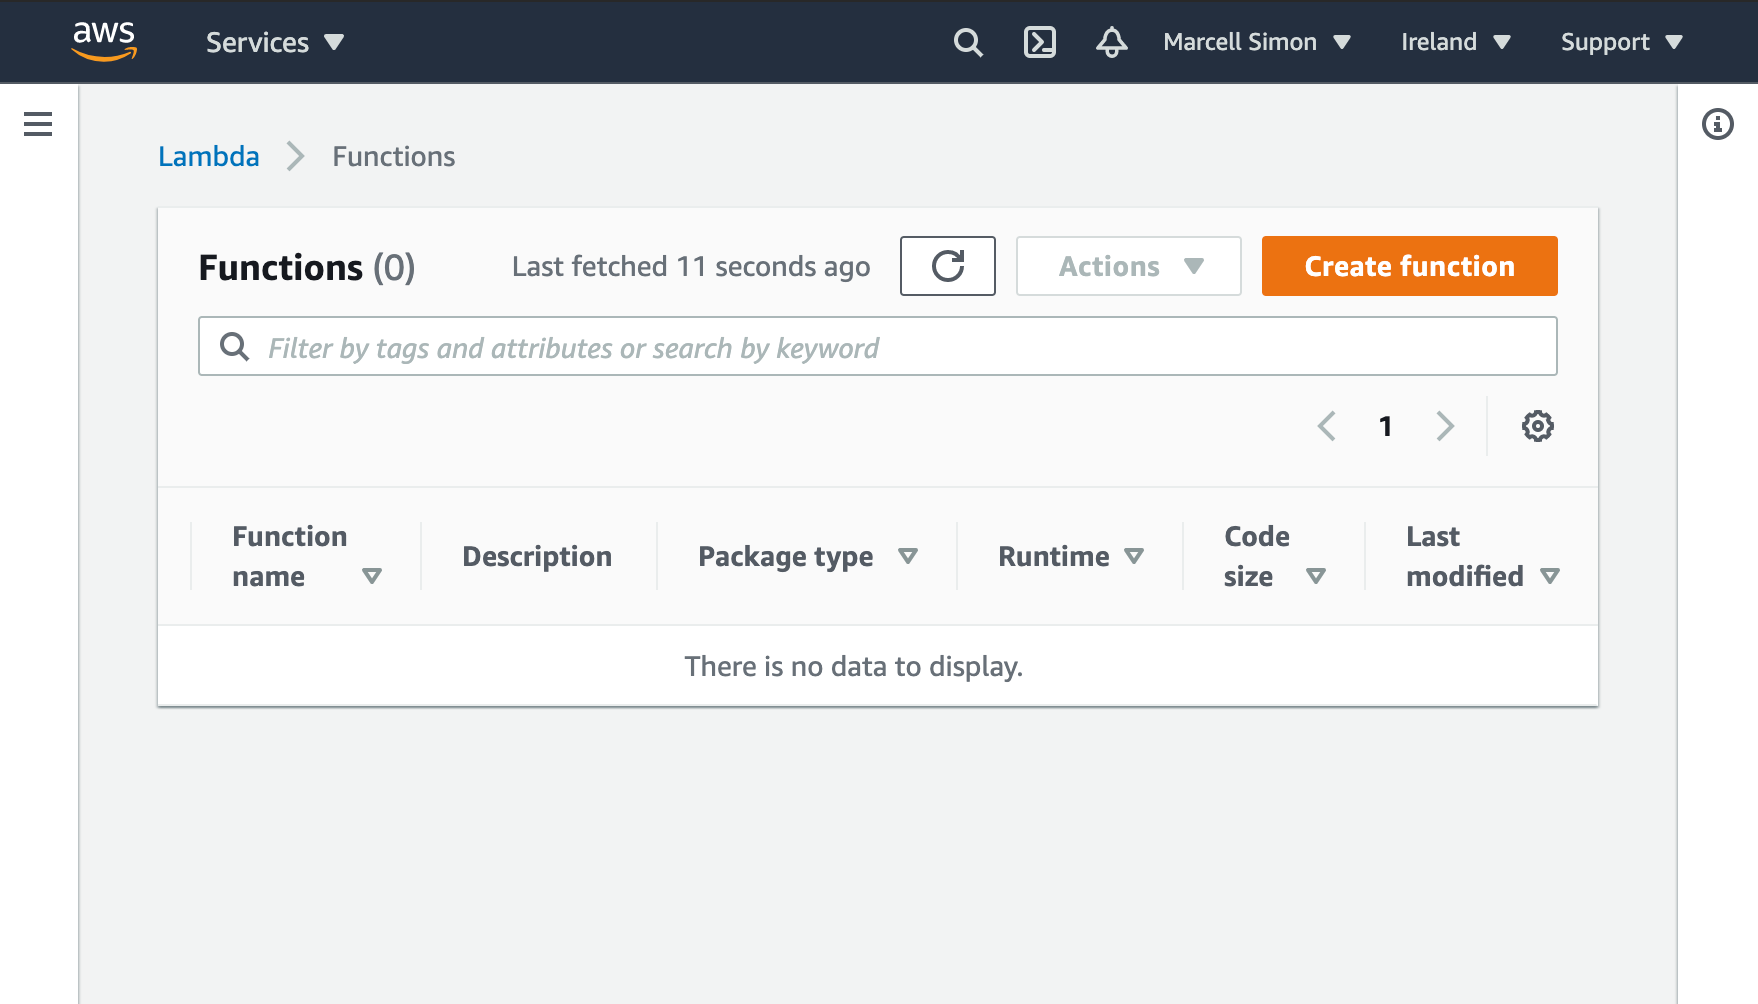
On the AWS console, you can search for Lambda, and then you can just create a new one.
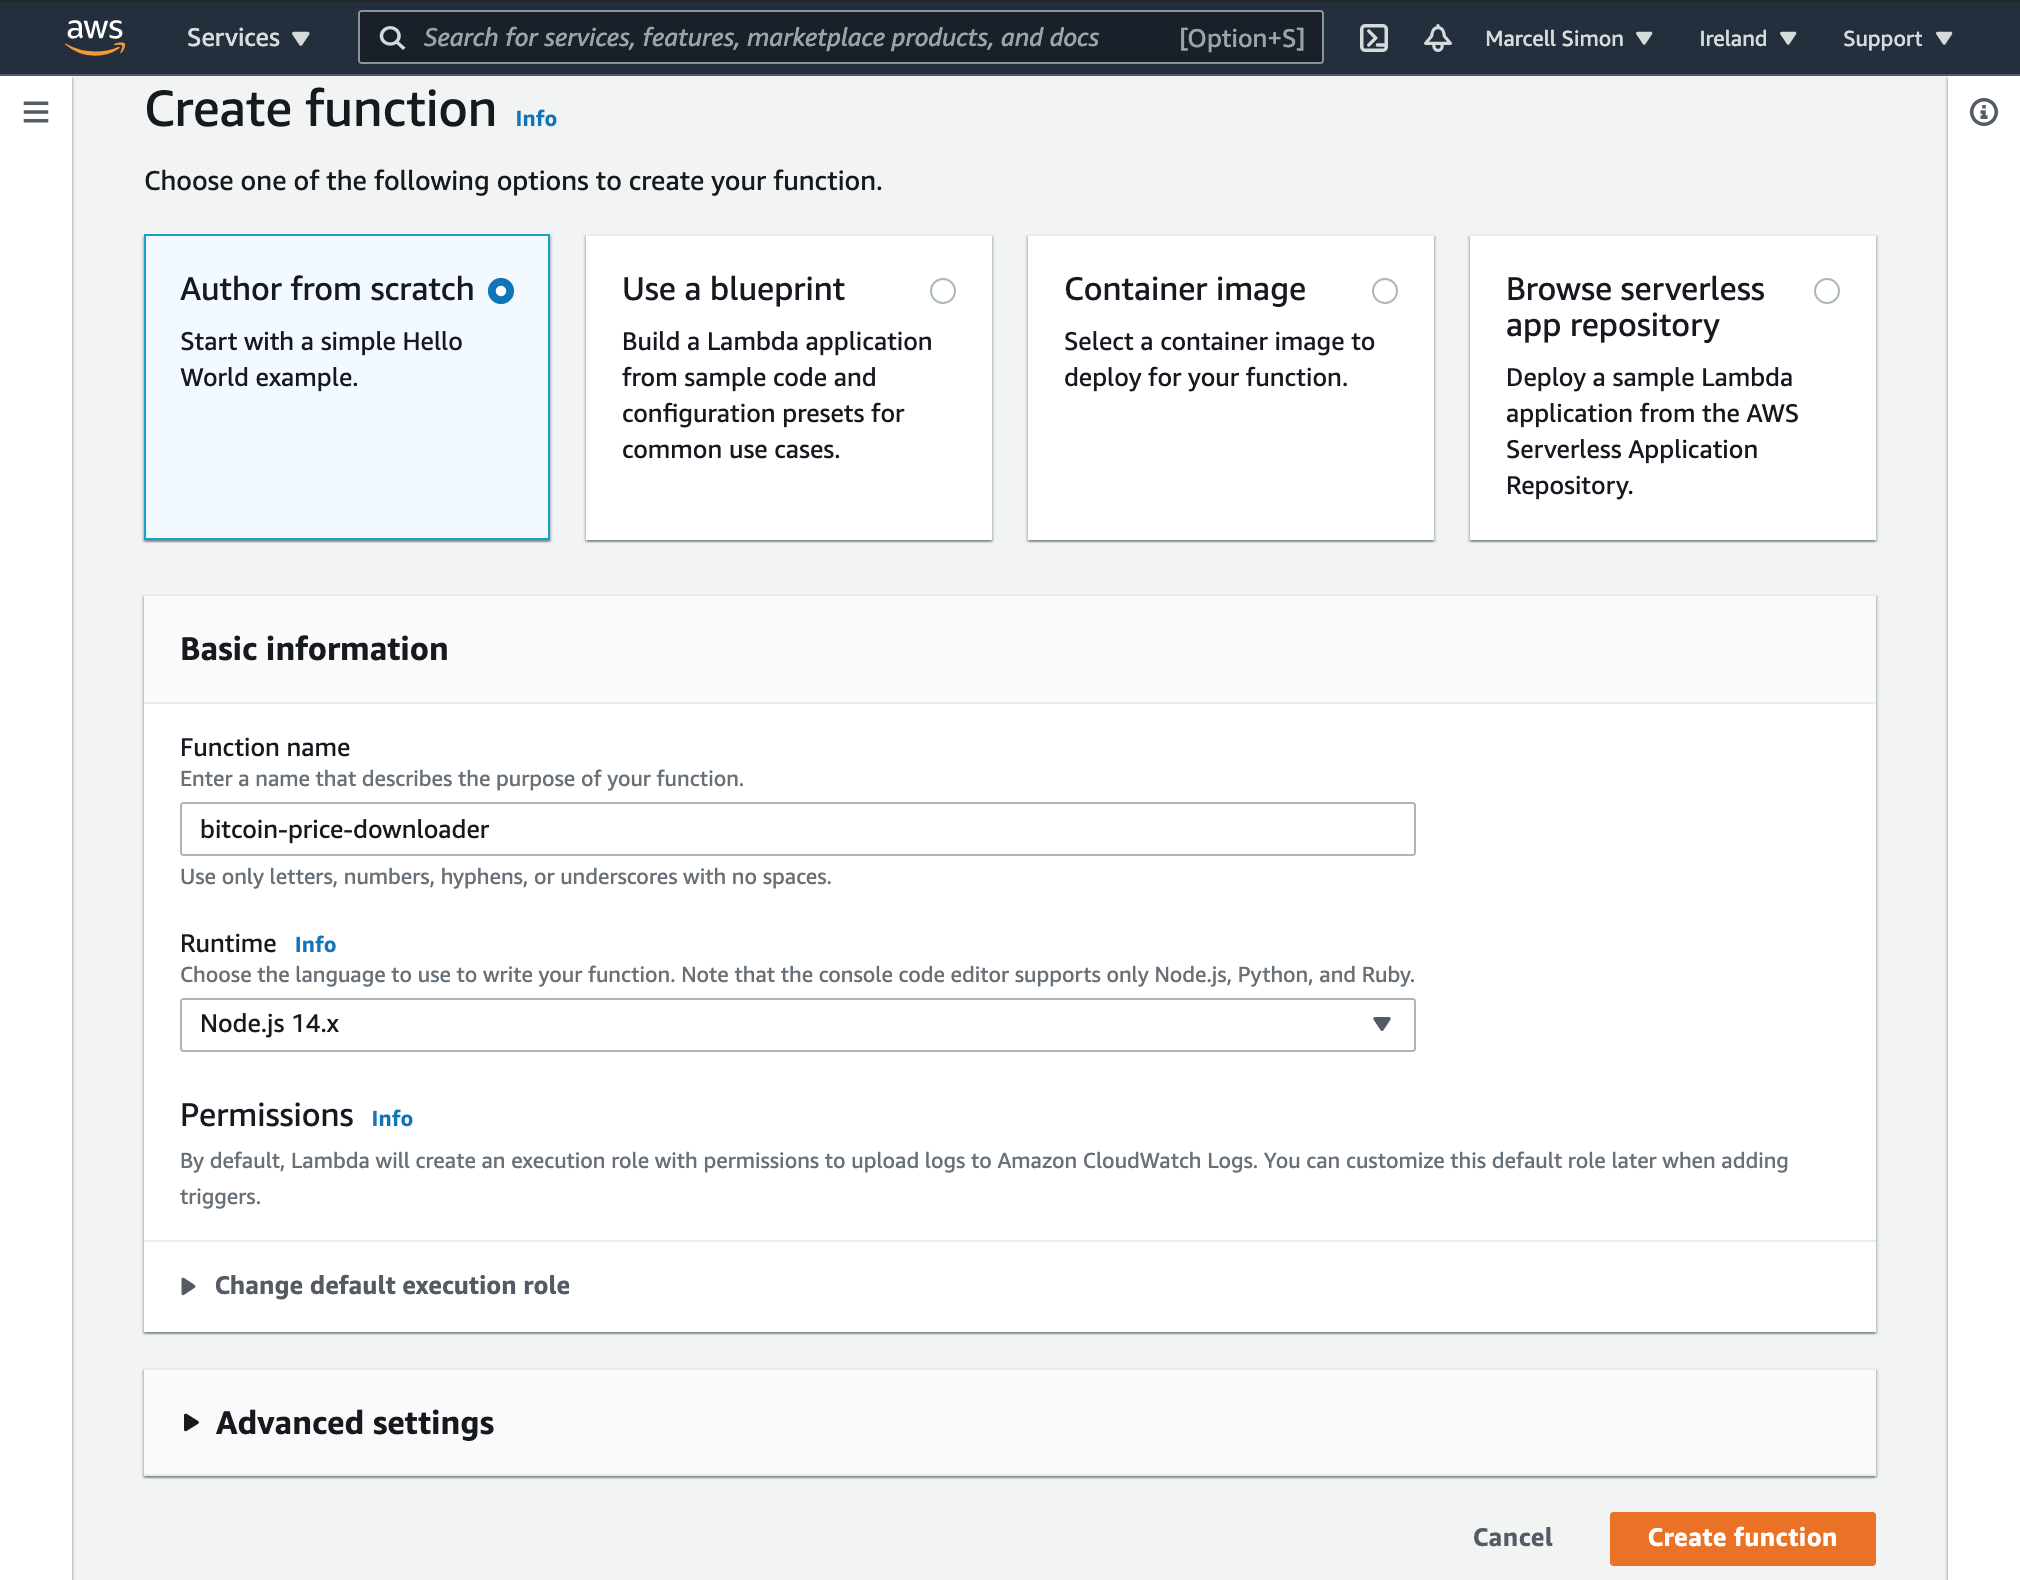
For this example I will use a simple function, so choose Author from scratch with Node.js 14.x.
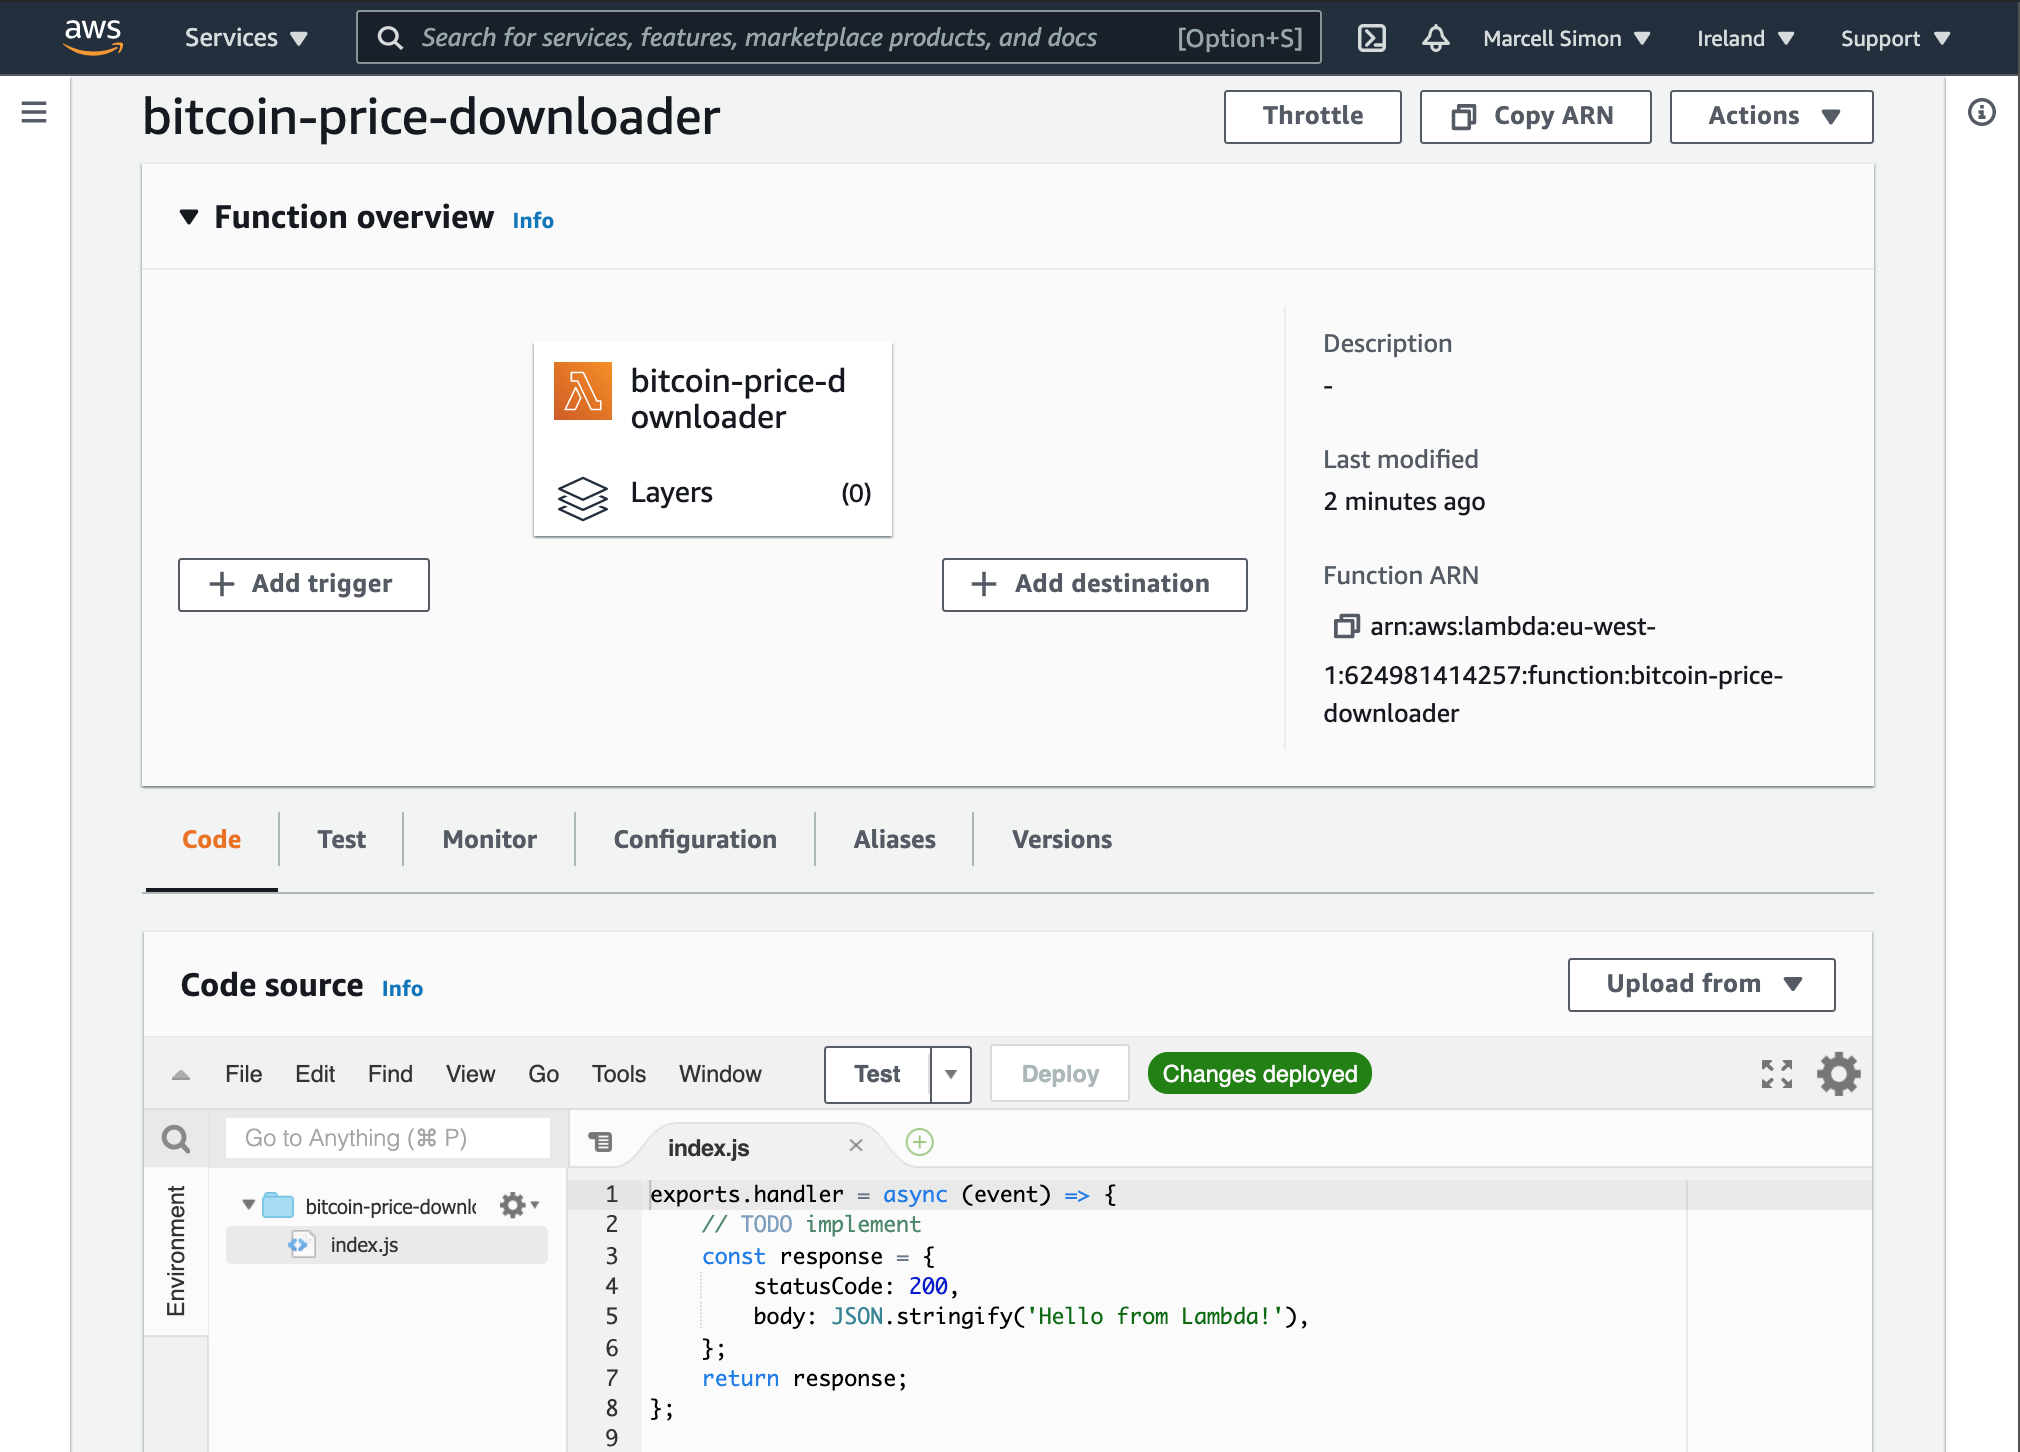
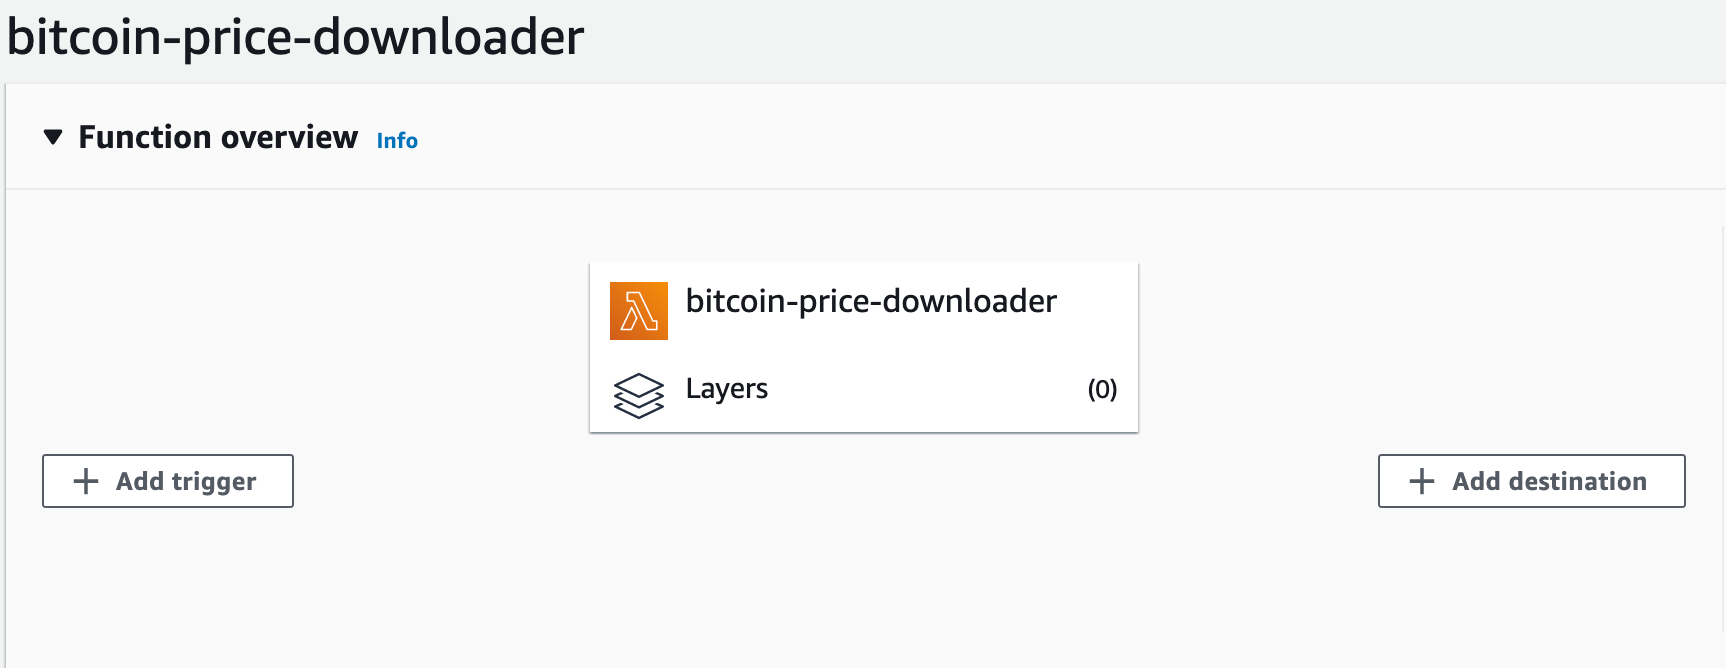
On top, you see the configuration. A trigger can be an API call, a timer, or an event from other AWS components, but I'll get back to that later. Destinations can be set up to handle a successful or failed Lambda run, i.e: send an email if the run failed. Another important part is Layers below our bitcoin-price-downloader block. We will need this to import packages to our Lambda later.
On the bottom you see the code you can edit.
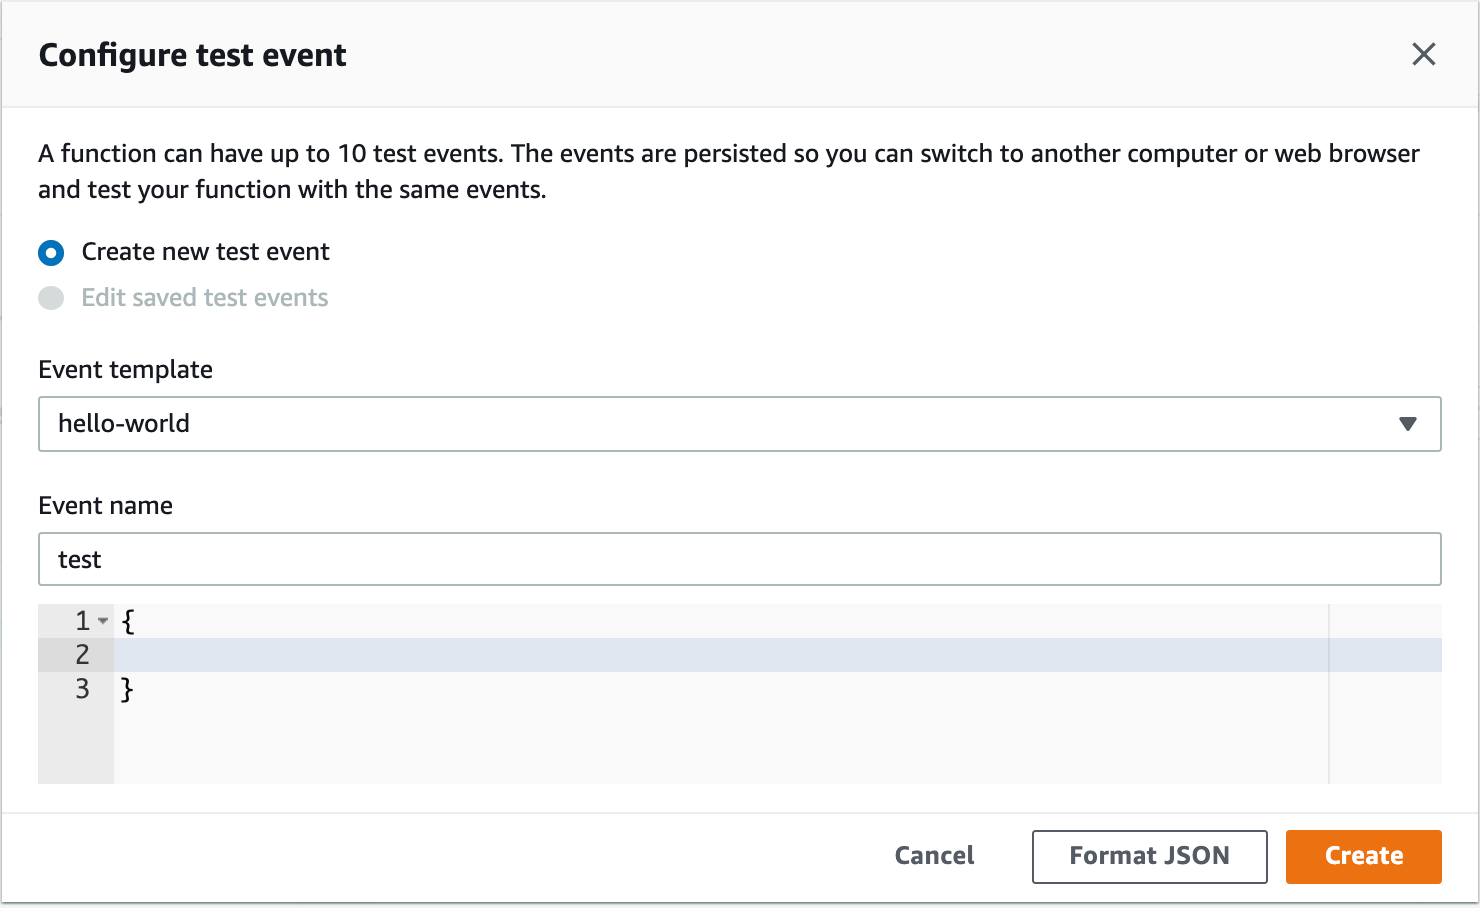
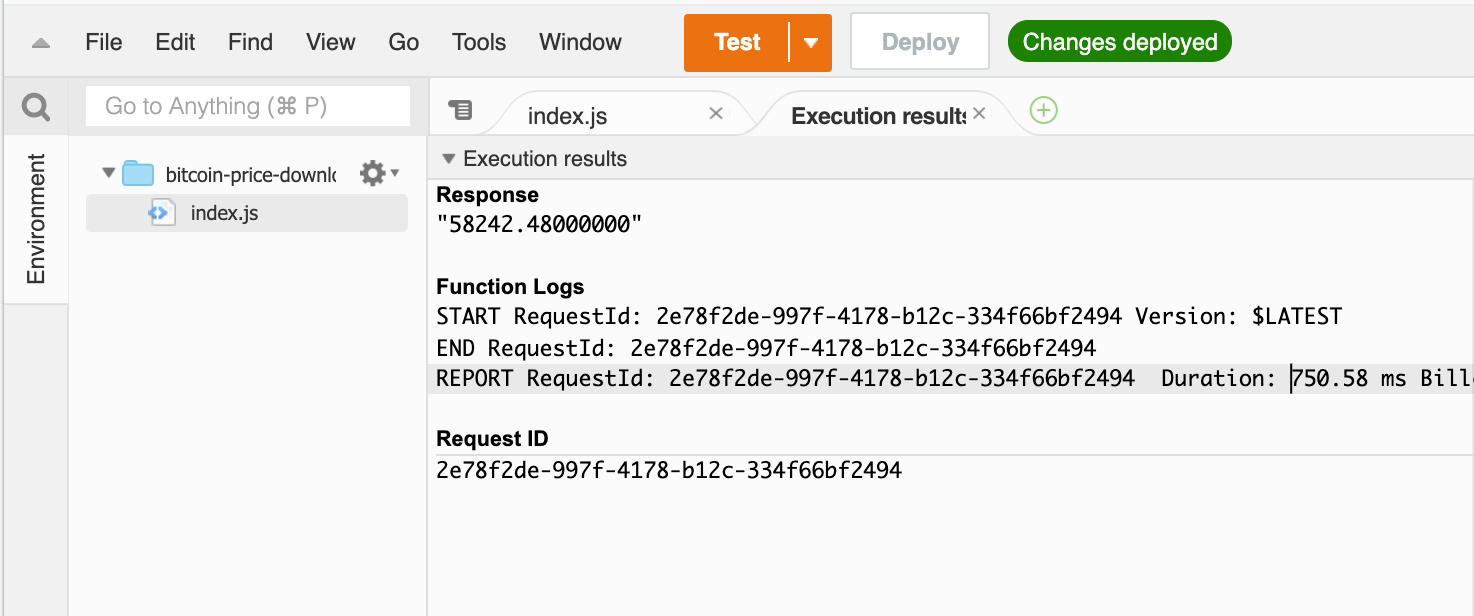
You can test our Lambda by pressing Test. It'll require a test event, but our Lambda won't have any input, so we can leave it empty.
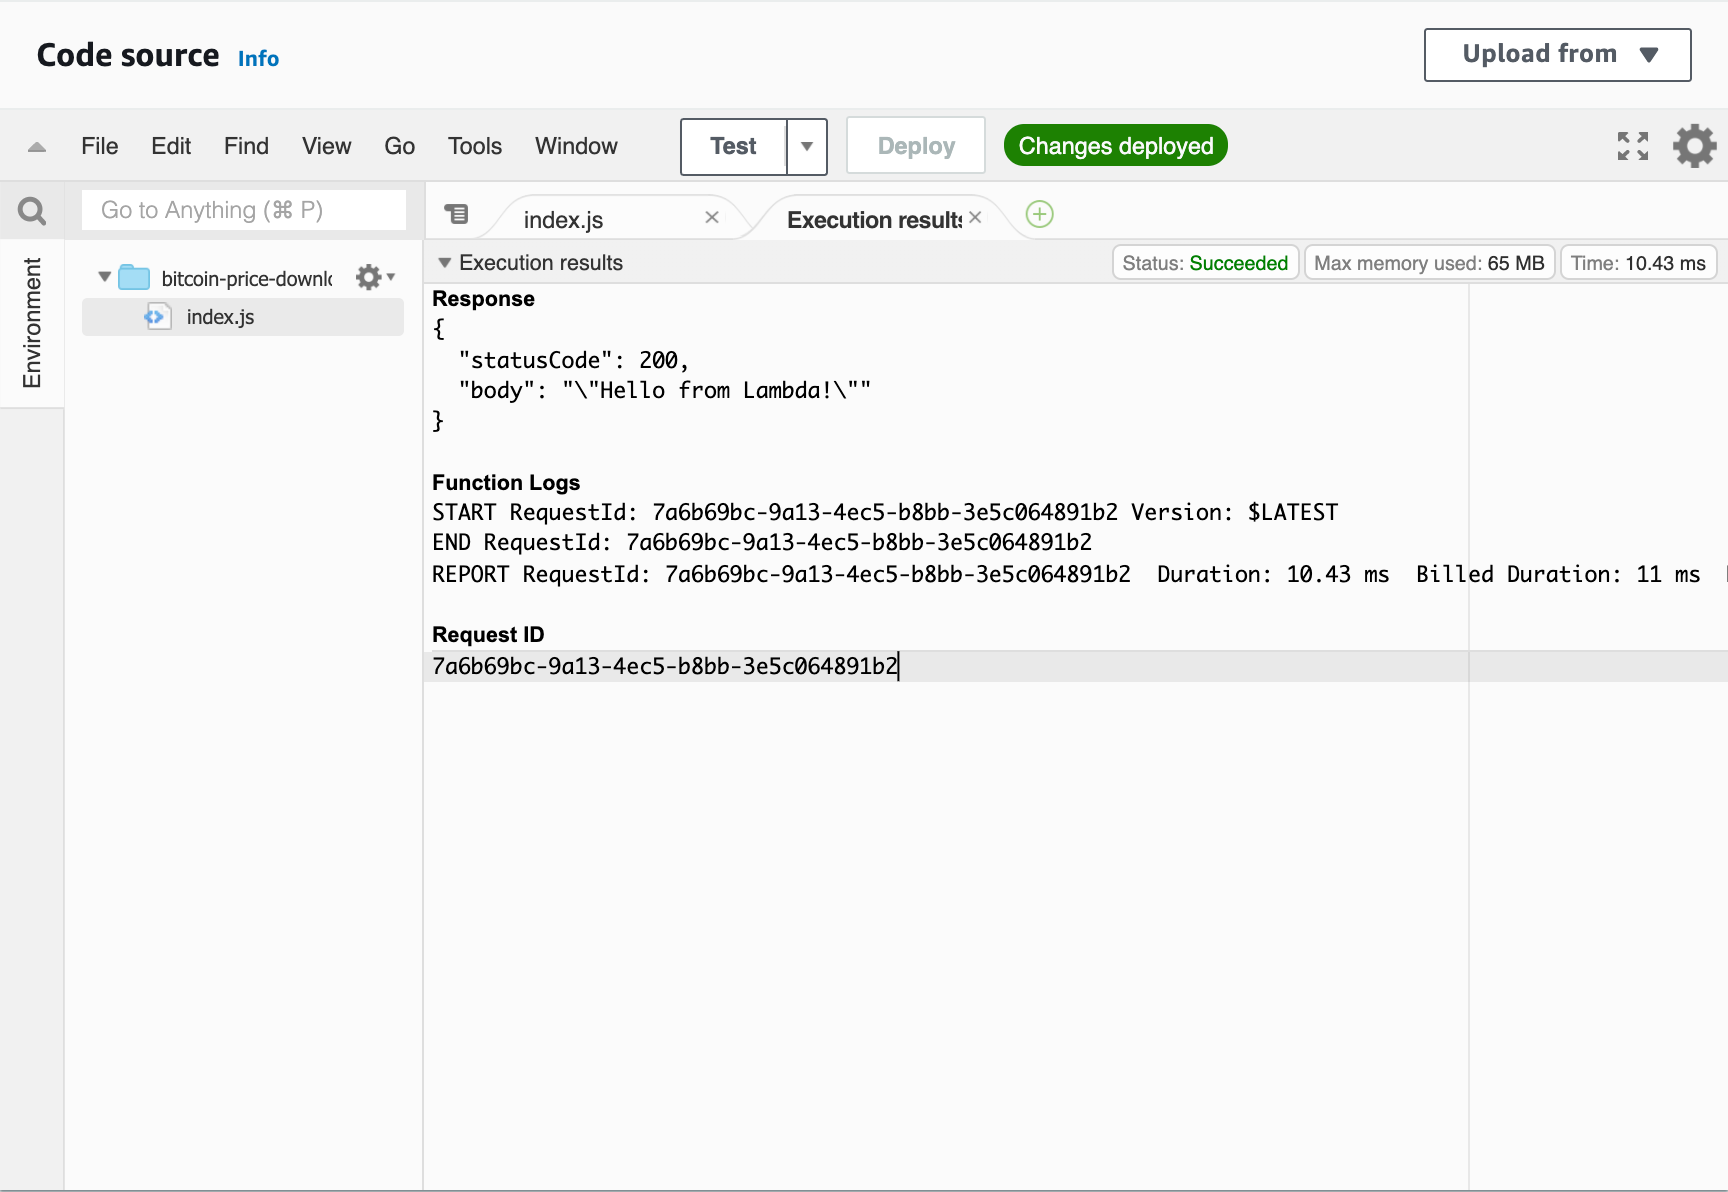
After execution, we see that we received the response.
Let's add the Binance API call. In the API docs, you can find the call to get the price for a certain symbol.
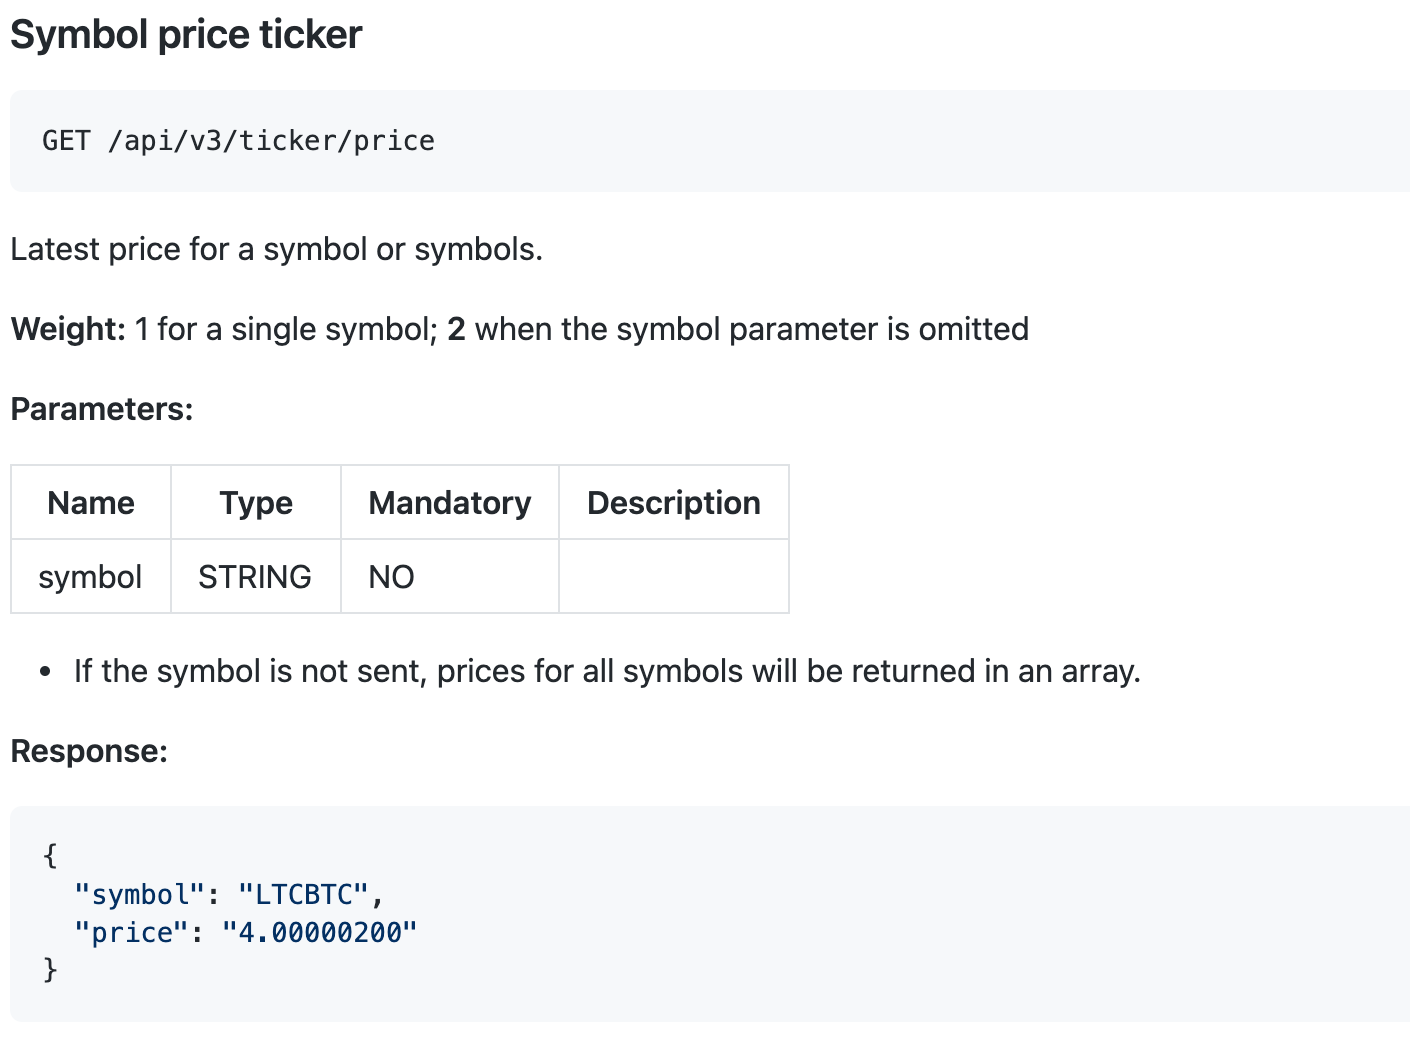
We are interested in the BTC price against the USD. But USD is not available on Binance. Fortunately, there are a lot of cryptos that are bound to the USD, such as USDT, BUSD, TUSD, etc. As USDT is the most widely used, let's use BTCUSDT as the symbol in the request.
The code
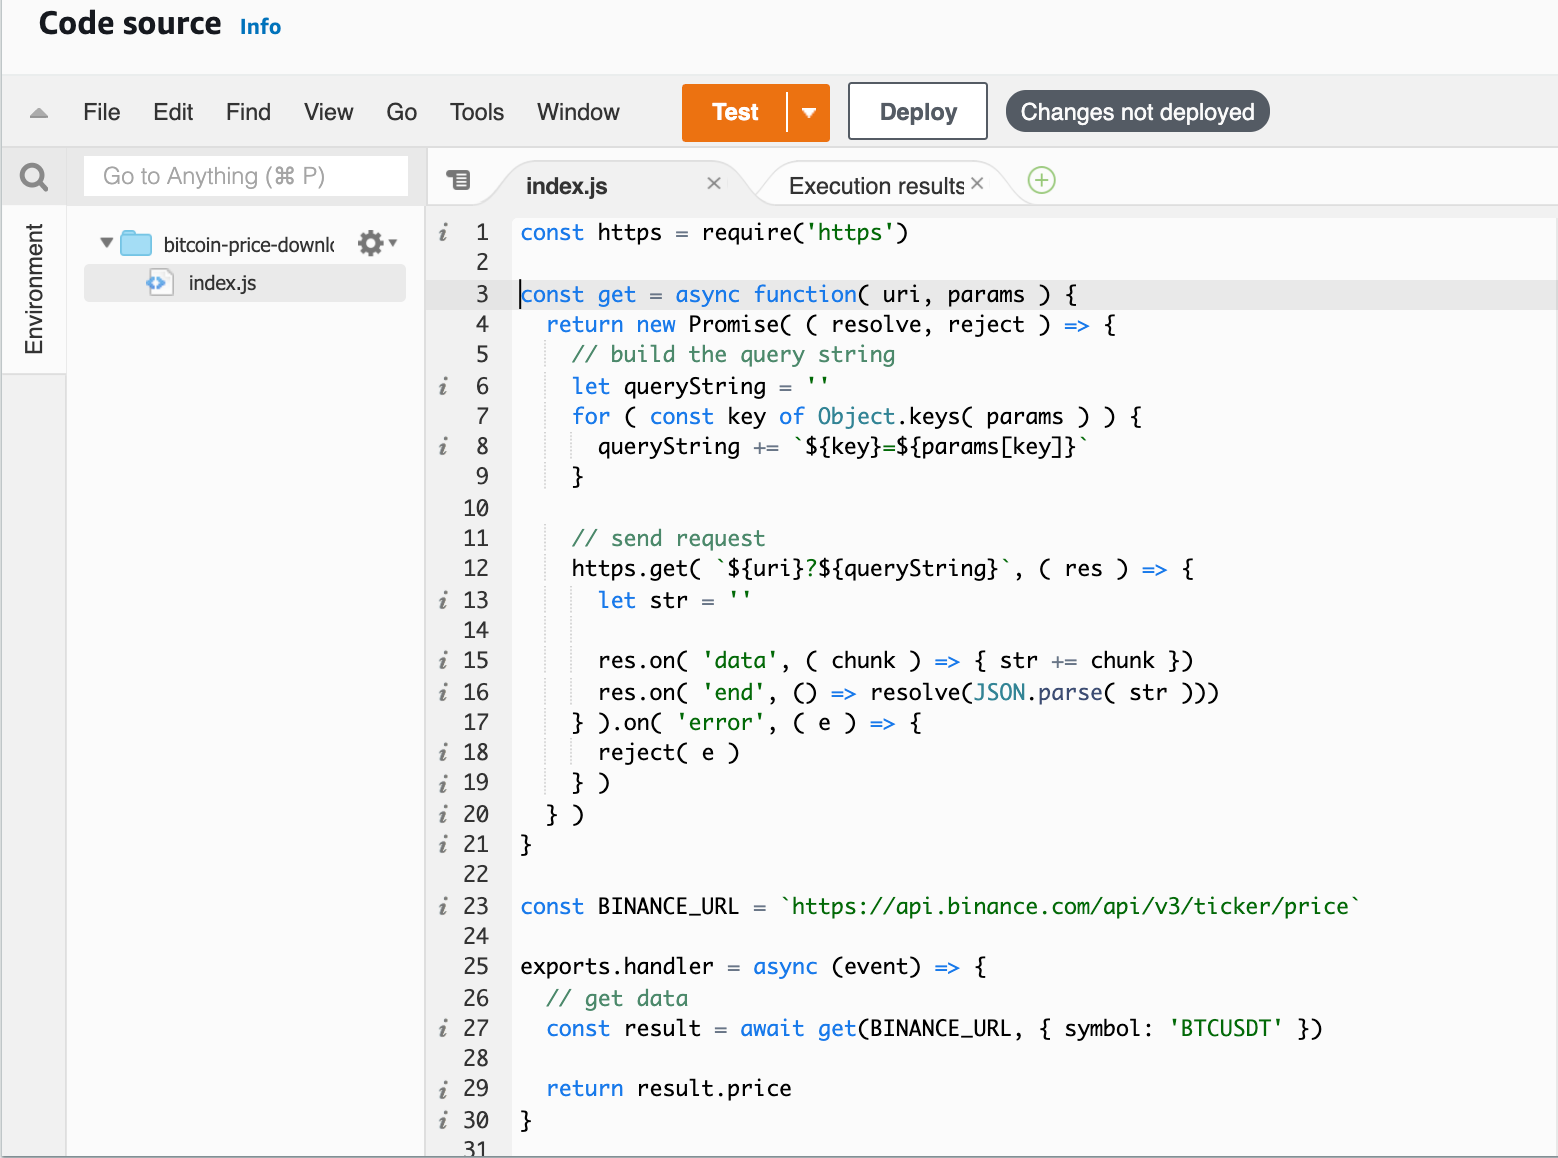
First of all, we need to make the GET request to that API and then process the response.
const BINANCE_URL = `https://api.binance.com/api/v3/ticker/price`

exports.handler = async (event) => {
  // get data
  const result = await get(BINANCE_URL, { symbol: 'BTCUSDT' })

  return result.price
}
To make lambdas smaller and faster it's better to use as few packages as possible. There are tons of packages for making network requests and I use them frequently, but for this function the https built-in package is great.
const https = require('https')

const get = async function( uri, params ) {
  return new Promise( ( resolve, reject ) => {
    // build the query string
    let queryString = ''
    for ( const key of Object.keys( params ) ) {
      queryString += `${key}=${params[key]}`
    }

    // send request
    https.get( `${uri}?${queryString}`, ( res ) => {
      let str = ''
      res.on( 'data', ( chunk ) => {
        str += chunk
      } )
      res.on( 'end', () => {
        // response received
        resolve( JSON.parse( str ) )
      } )
    } ).on( 'error', ( e ) => {
      reject( e )
    } )
  } )
}Don't worry, I'll use TypeScript later, but for the sake of simplicity I'll start with plain JavaScript
So putting them together our code looks like this:
Don't forget to press Deploy. Without that Test would call the previous version of our code. And that's it! We can see the actual BTC price. Don't forget that it's a string in the response, so if we want to use it in the future, we should use parseFloat().
Add a timer
Now that we can get the price for Bitcoin it would be great to get it every hour so we can get notified if the price goes up.
On the Functional overview, we can add a new trigger to call our Lambda. For time-based events, we have to use EventBridge.
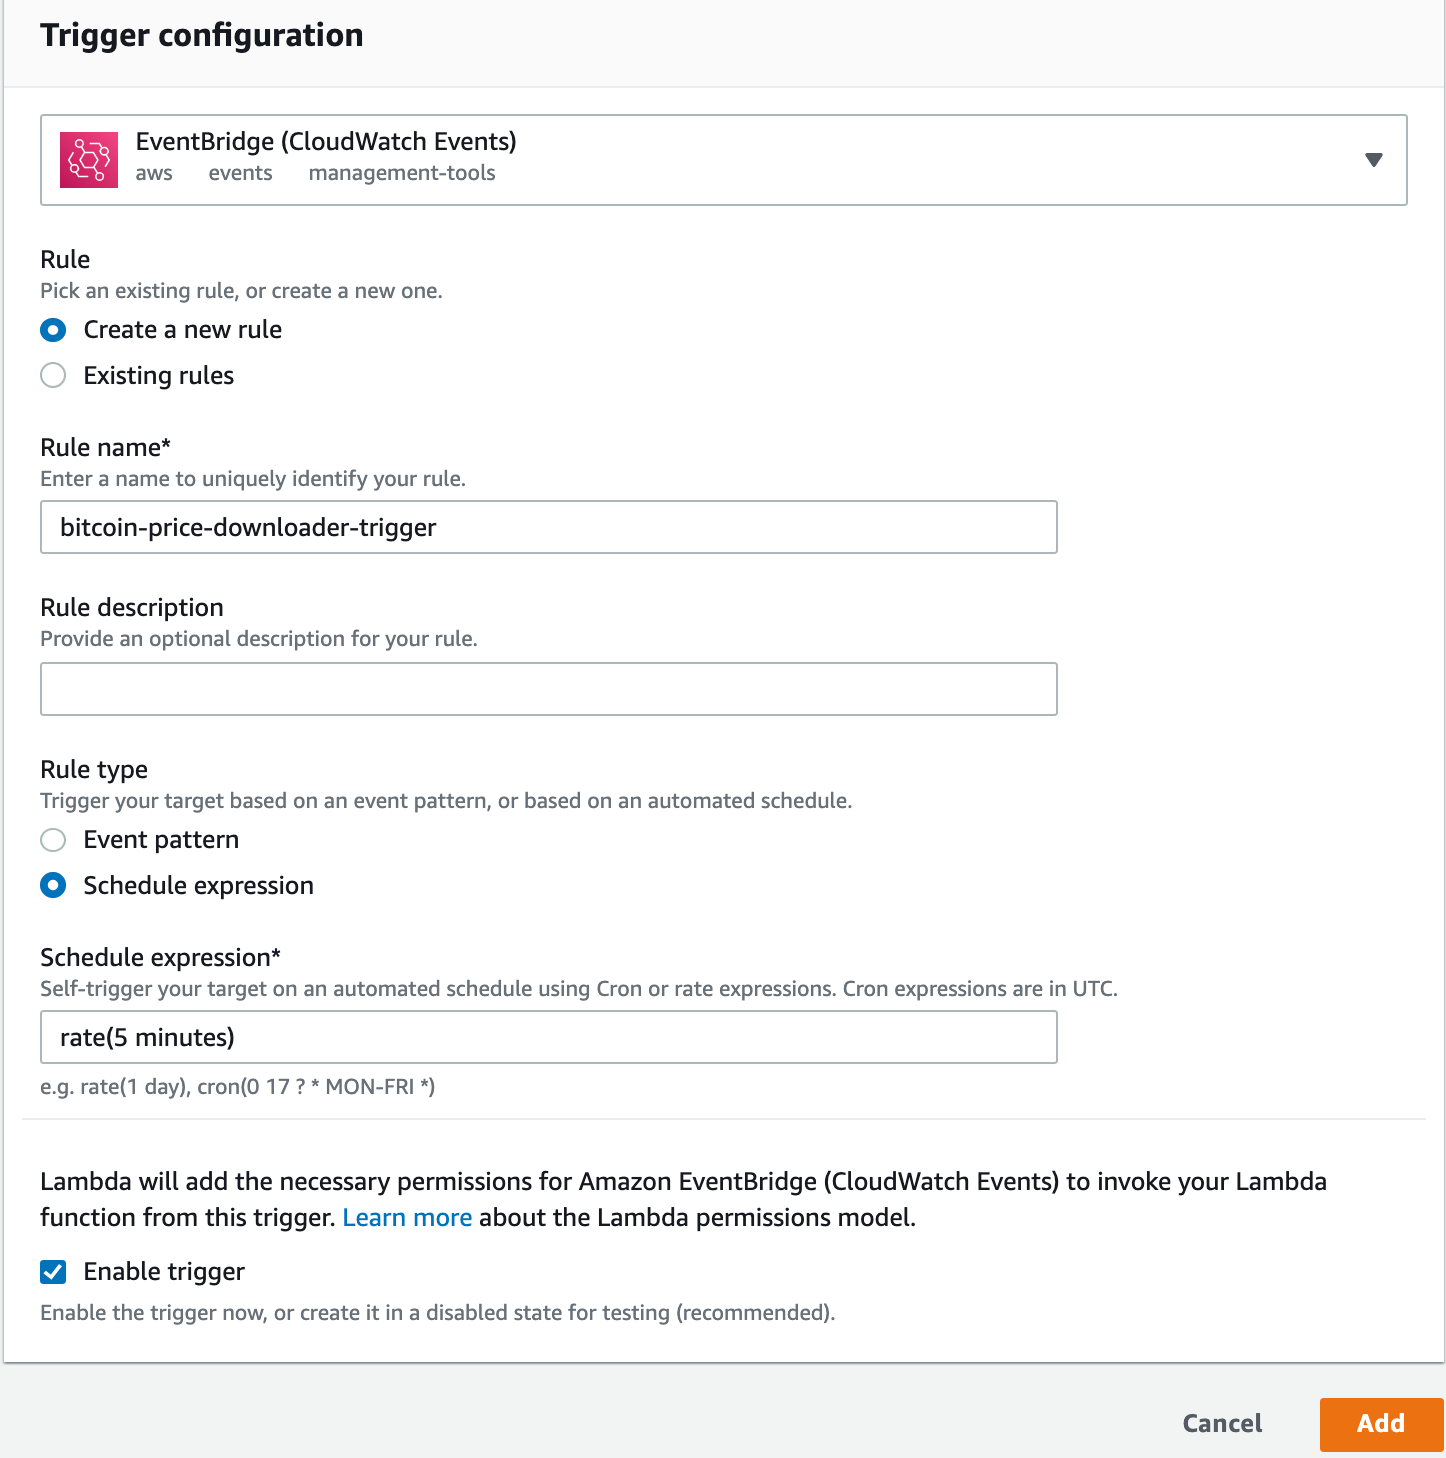
One important note: If you want to use 1 hour as the rate, you have to use `1 hour`. But for more than one, you have to use plural, like `5 minutes`. Strangely AWS is sensitive about this.
For testing, I'll use 5 minutes, but you can set it to any time. After adding the trigger, it'll immediately start working. But how do we know what happened? AWS has a logging service called CloudWatch.
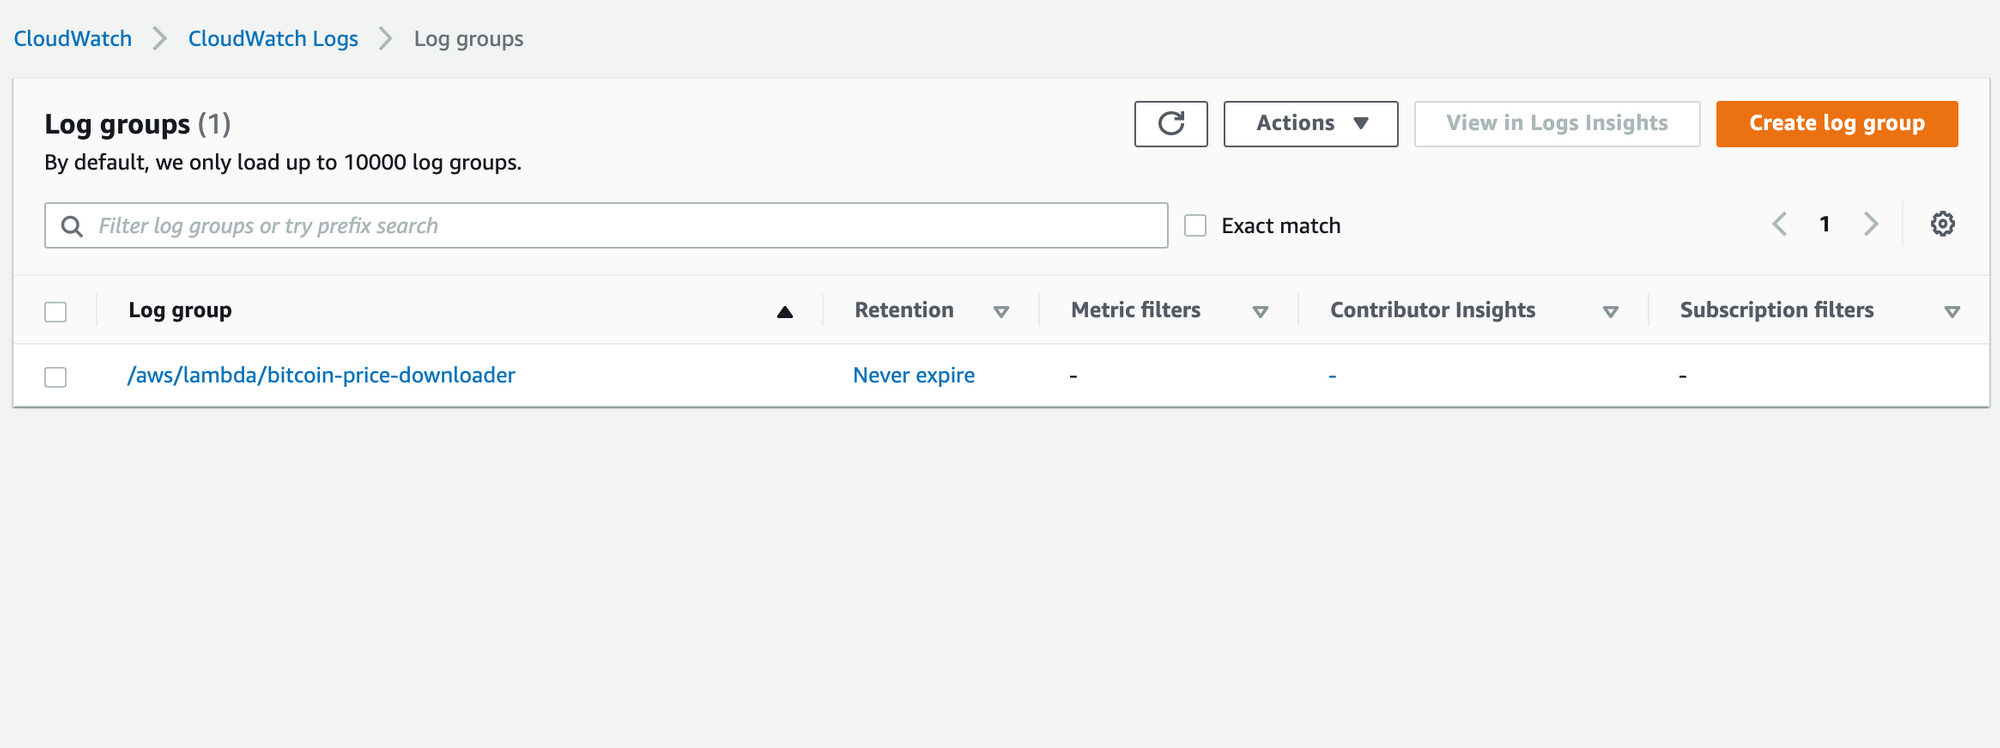
Within the Log Groups, you can see our Lambda and every version of it.
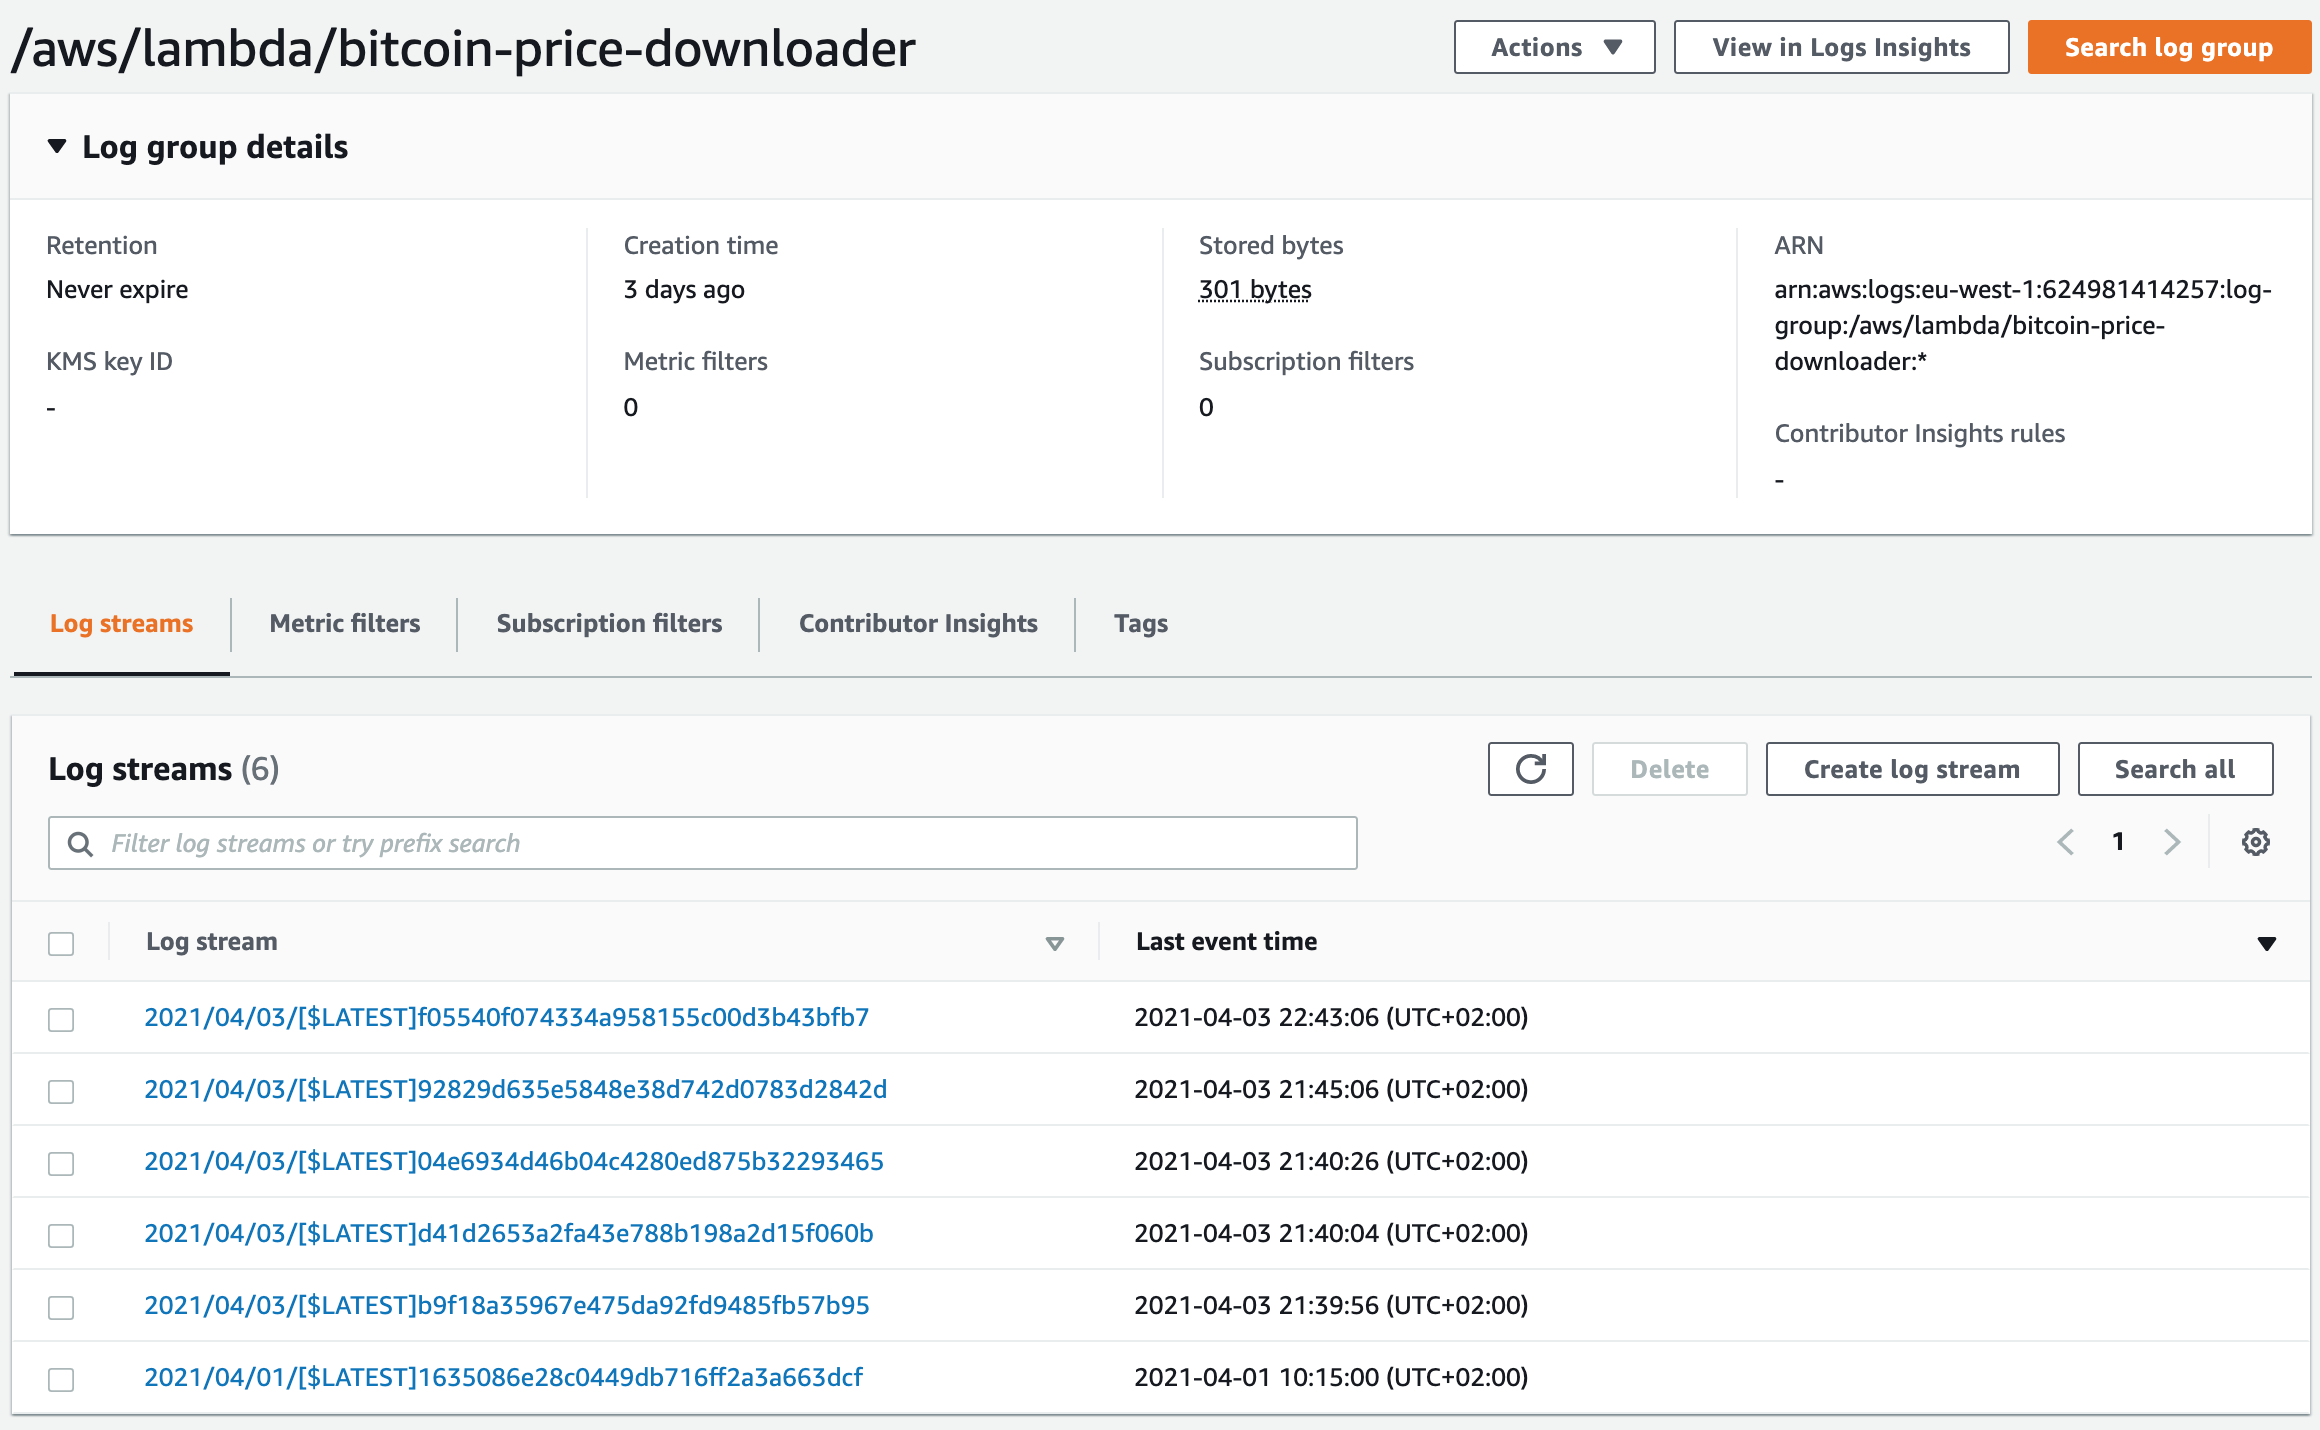
If you check the latest one (on top) you can see the logs for each invocation.
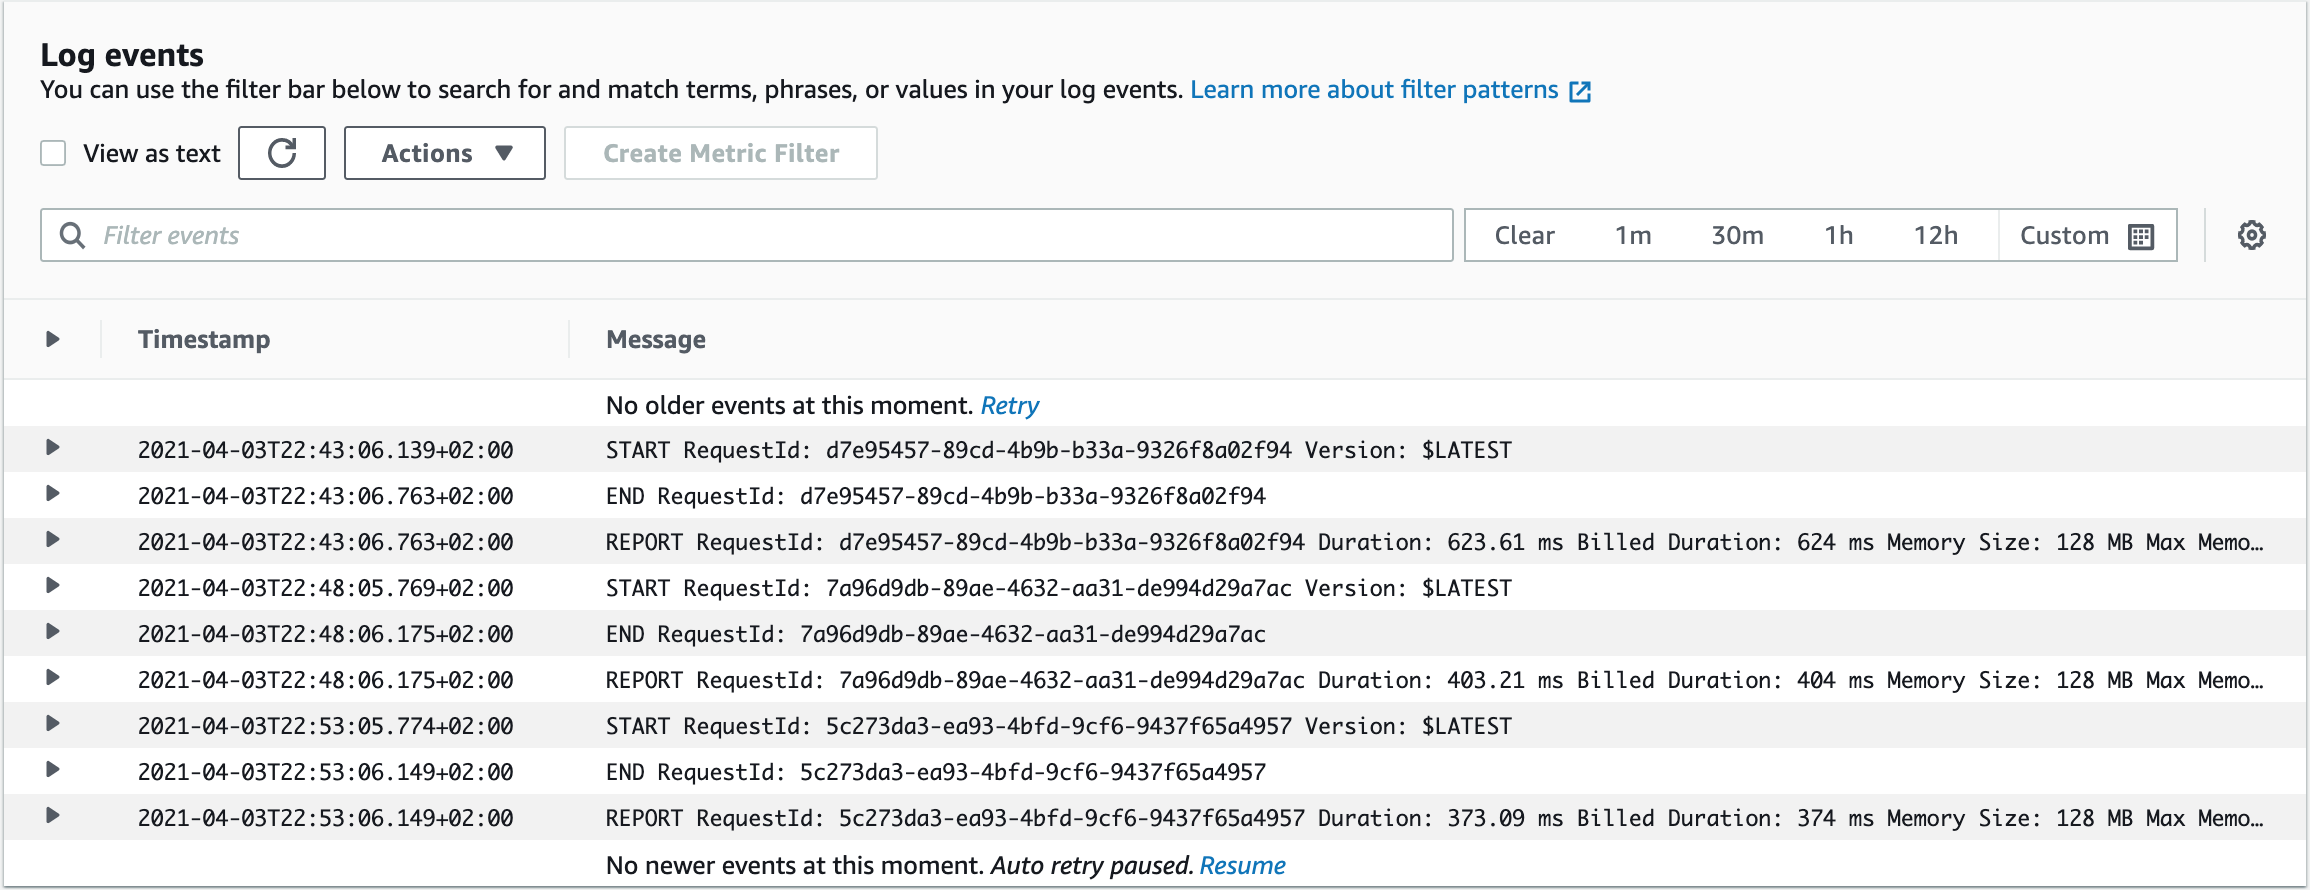
You can see it was called in every 5 minutes. The different durations are due to Binance's response time.
In the next chapter, we will add an API Gateway to this Lambda to be able to call it from the internet and get the price anytime we want.